

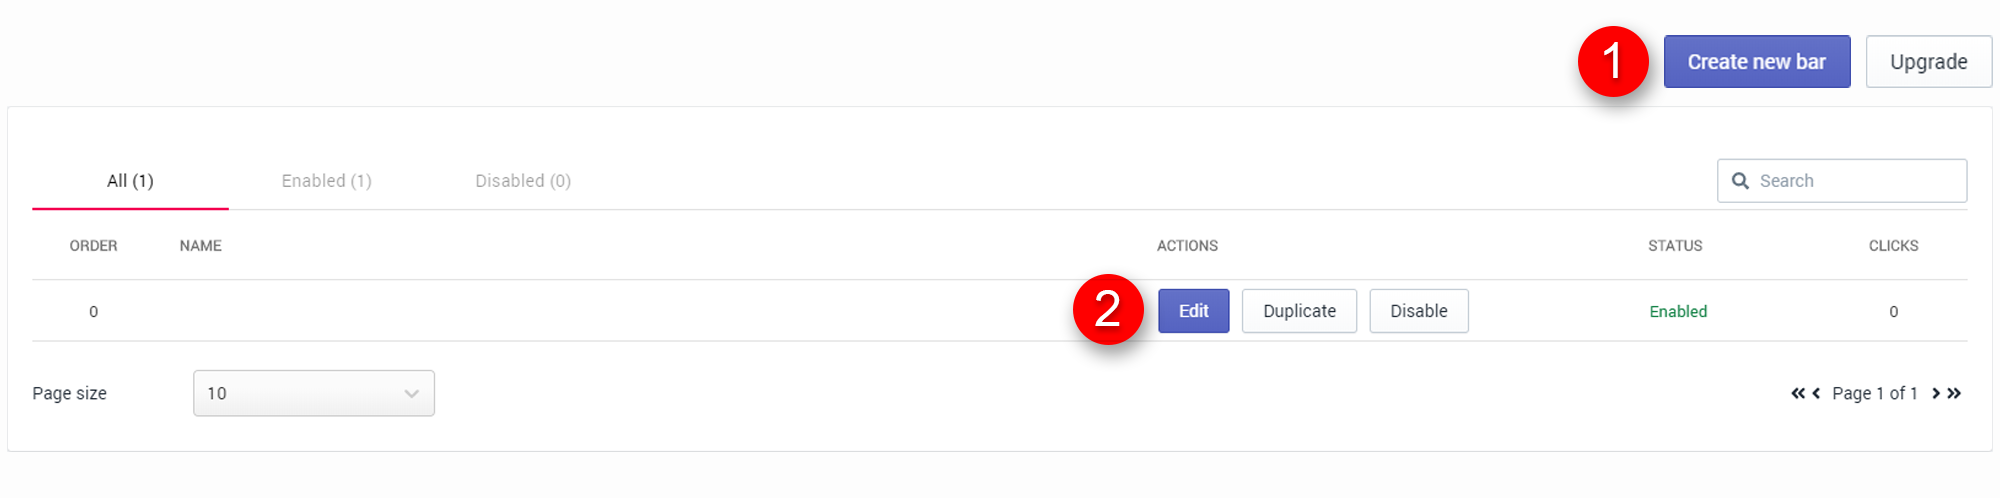
For this guide, please, click on “Create new bar” (1) or edit an existing bar (2).
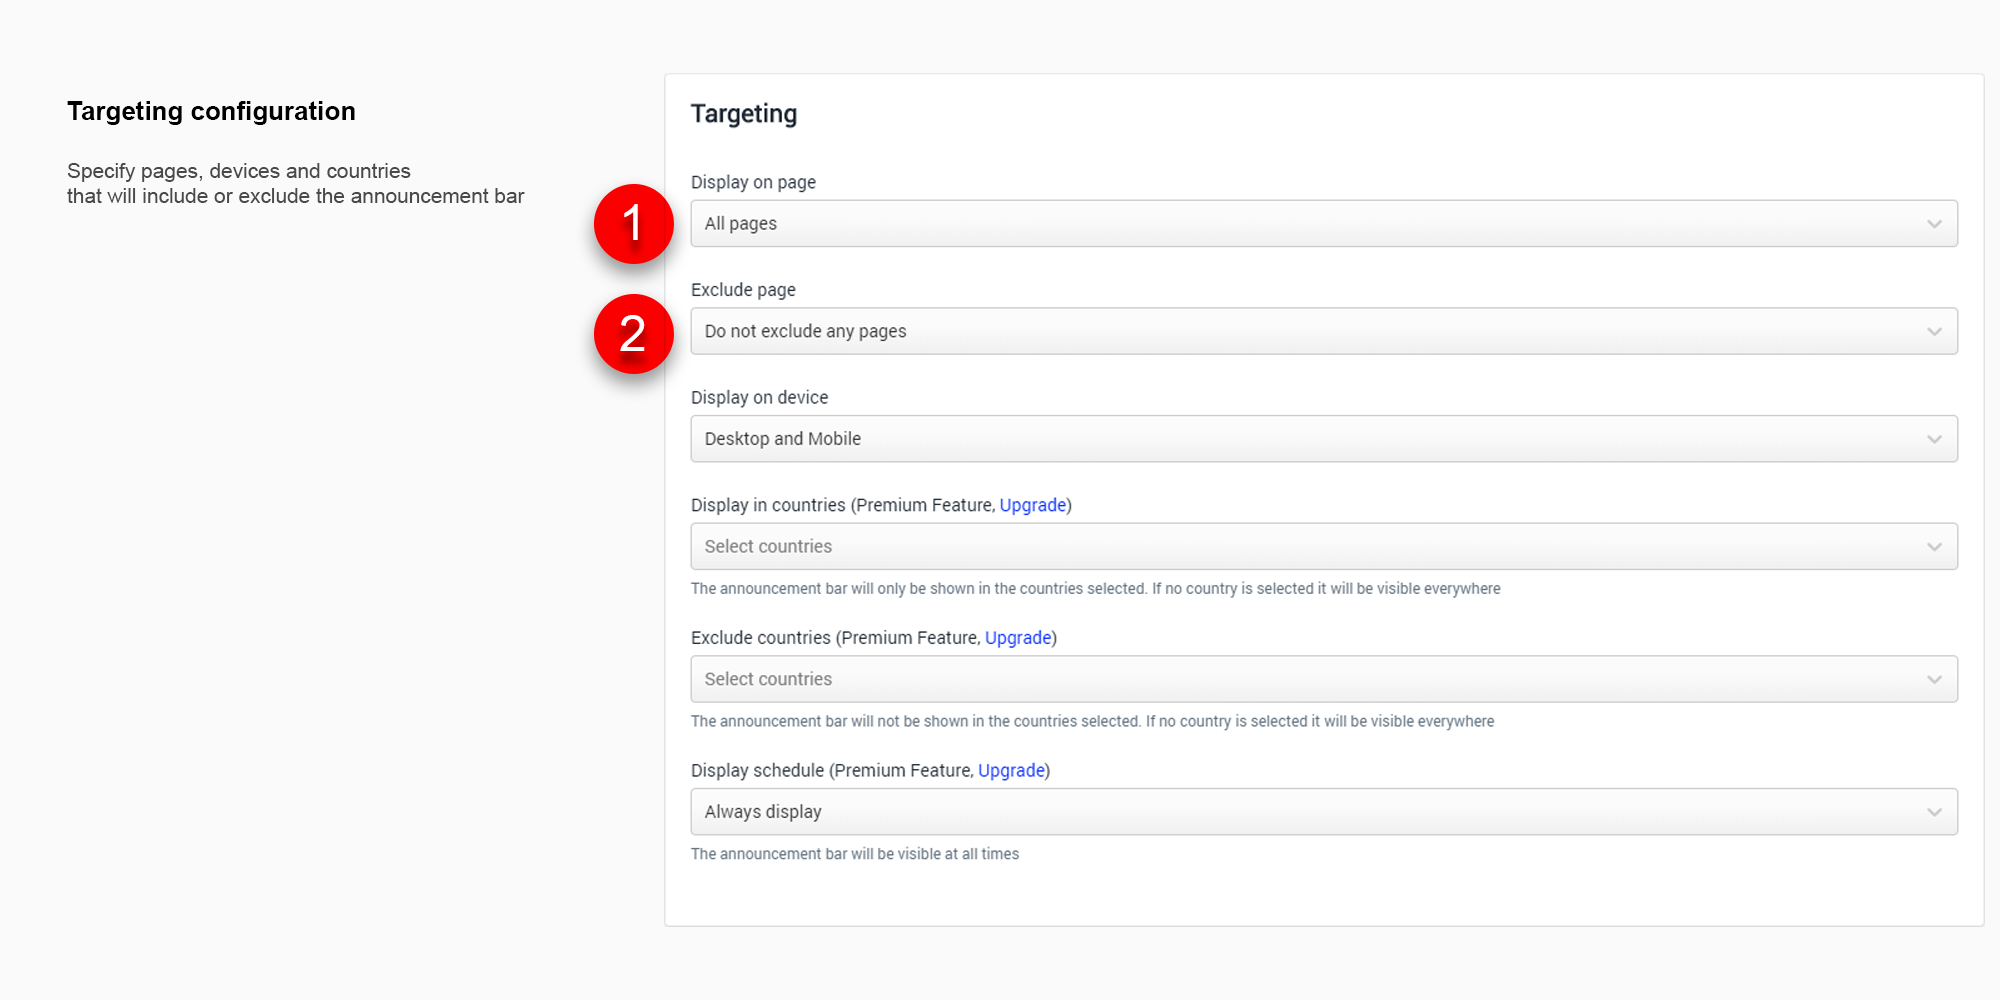
When in the edit page, scroll down to the very bottom section called “Targeting configuration”.
The two options related to page targeting are “Display on page” (1) and “Exclude page” (2). We will focus on these fields.
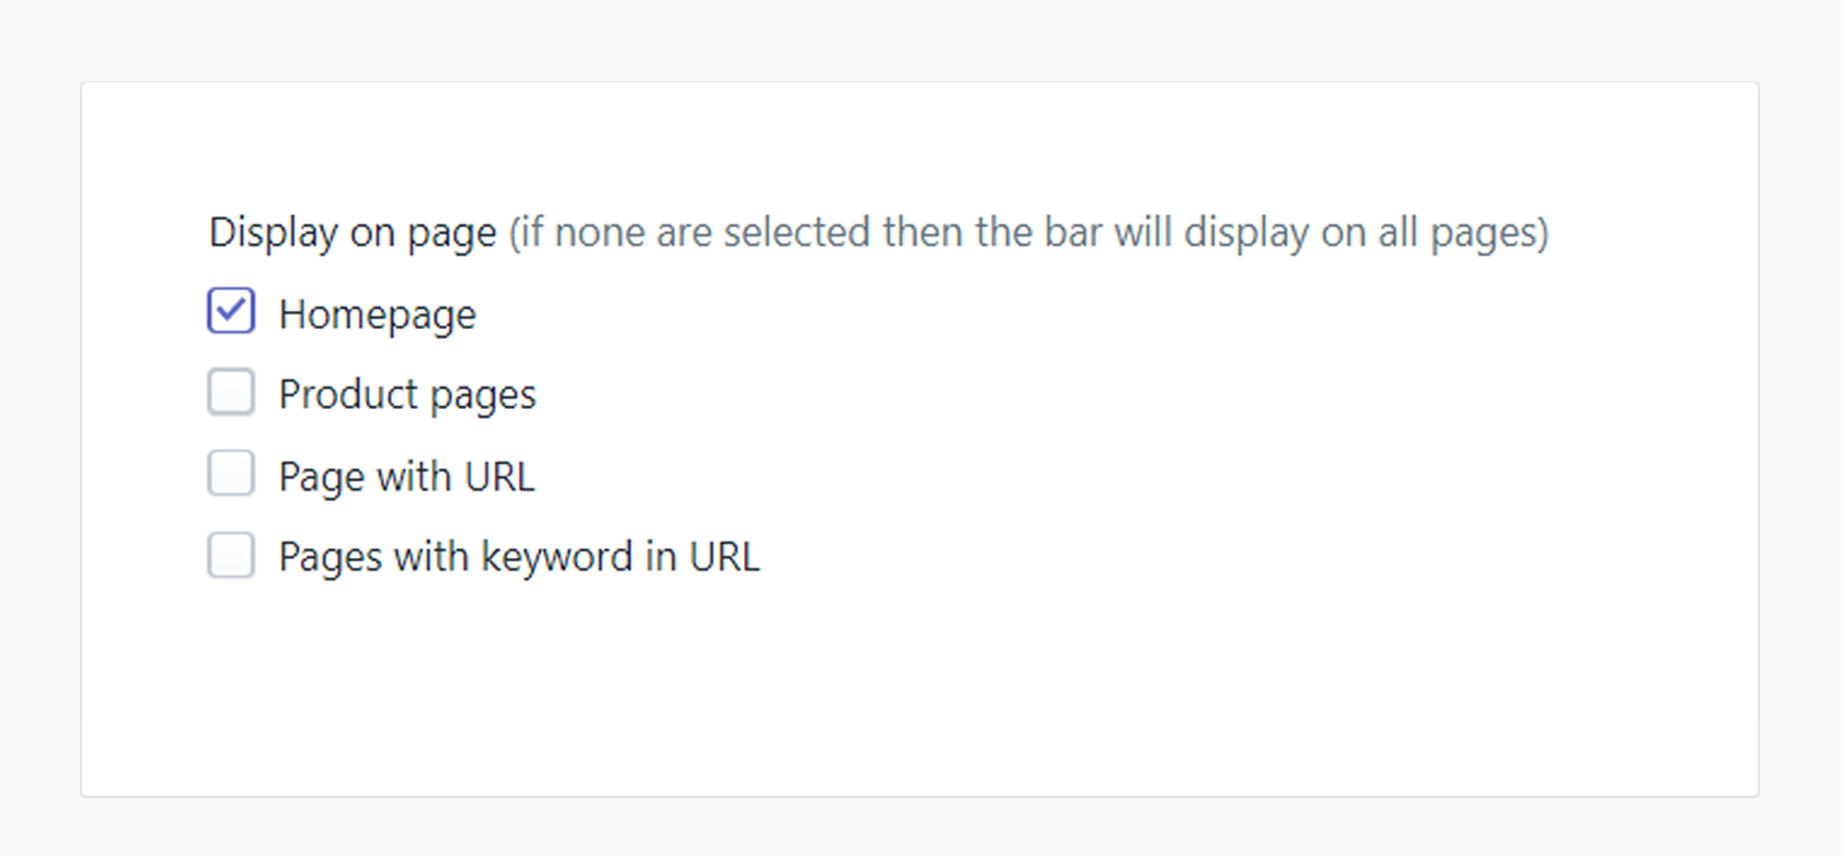
By default, the announcement bar will be visible on every page.
The “Display on page” field is suitable if you would like to show the announcement bar on a few pages. If you select “Homepage”, the bar will only be visible on the homepage.
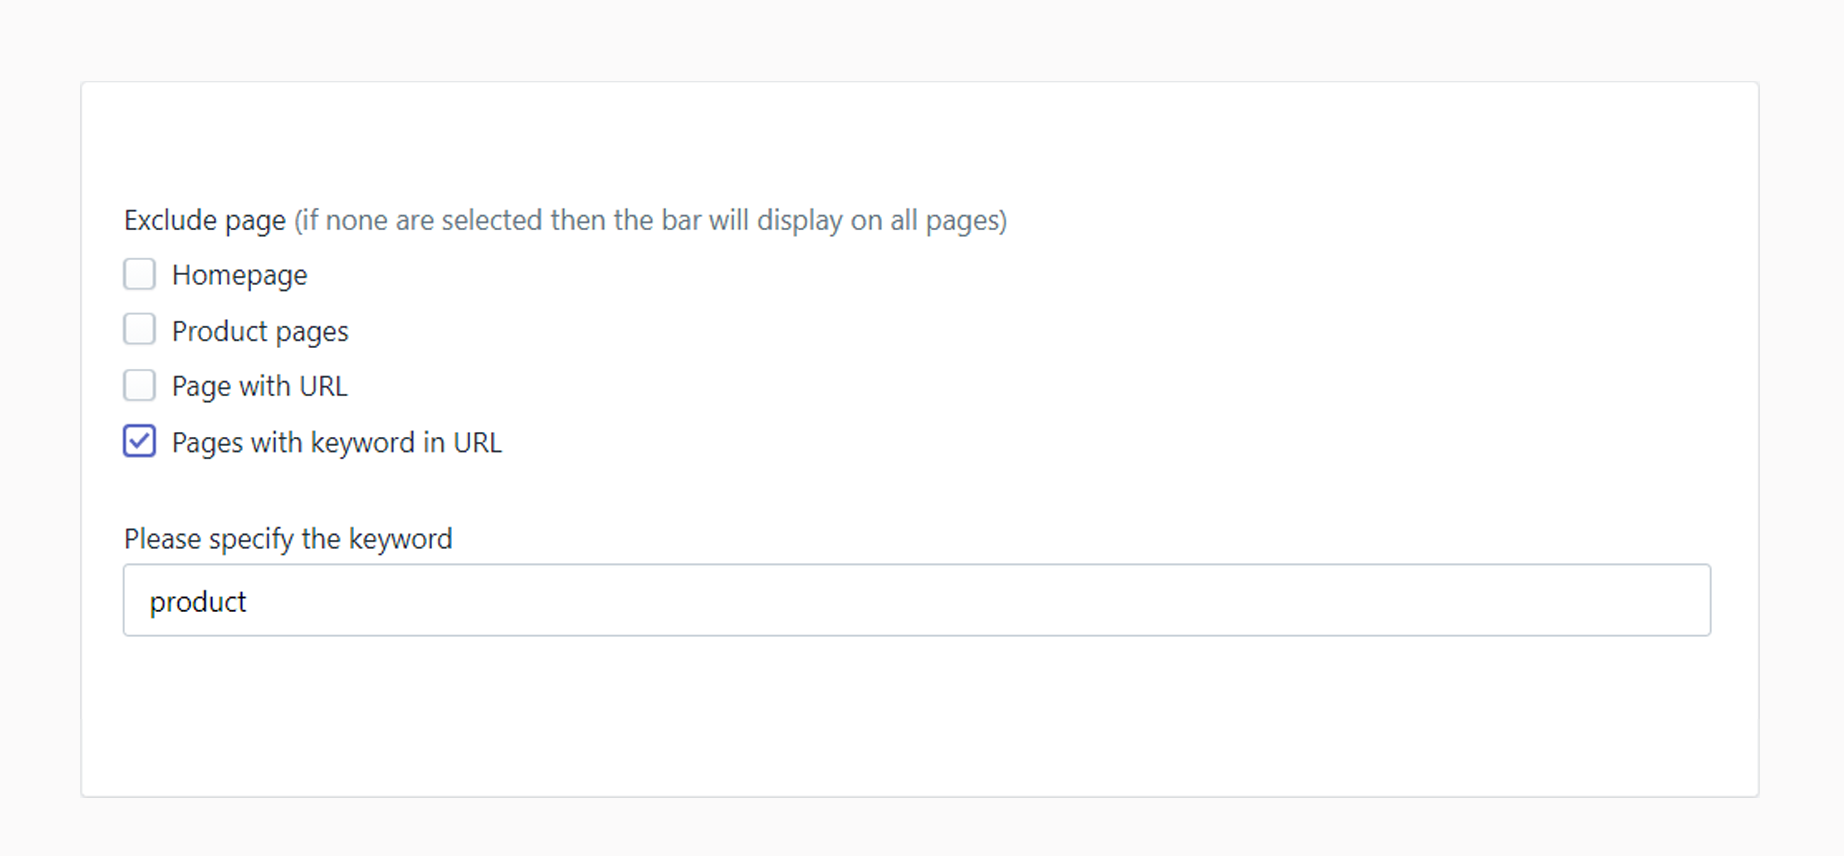
“Exclude page” field is suitable if you would like to exclude the announcement bar on a few pages. In this scenario, if you select “Homepage”, the bar will be visible on all pages except the homepage.

Targeting homepage is pretty straightforward, however you can also choose to include/exclude specific URLs. It’s best to visit the page you are looking to include/exclude and copy the URL from the address bar.
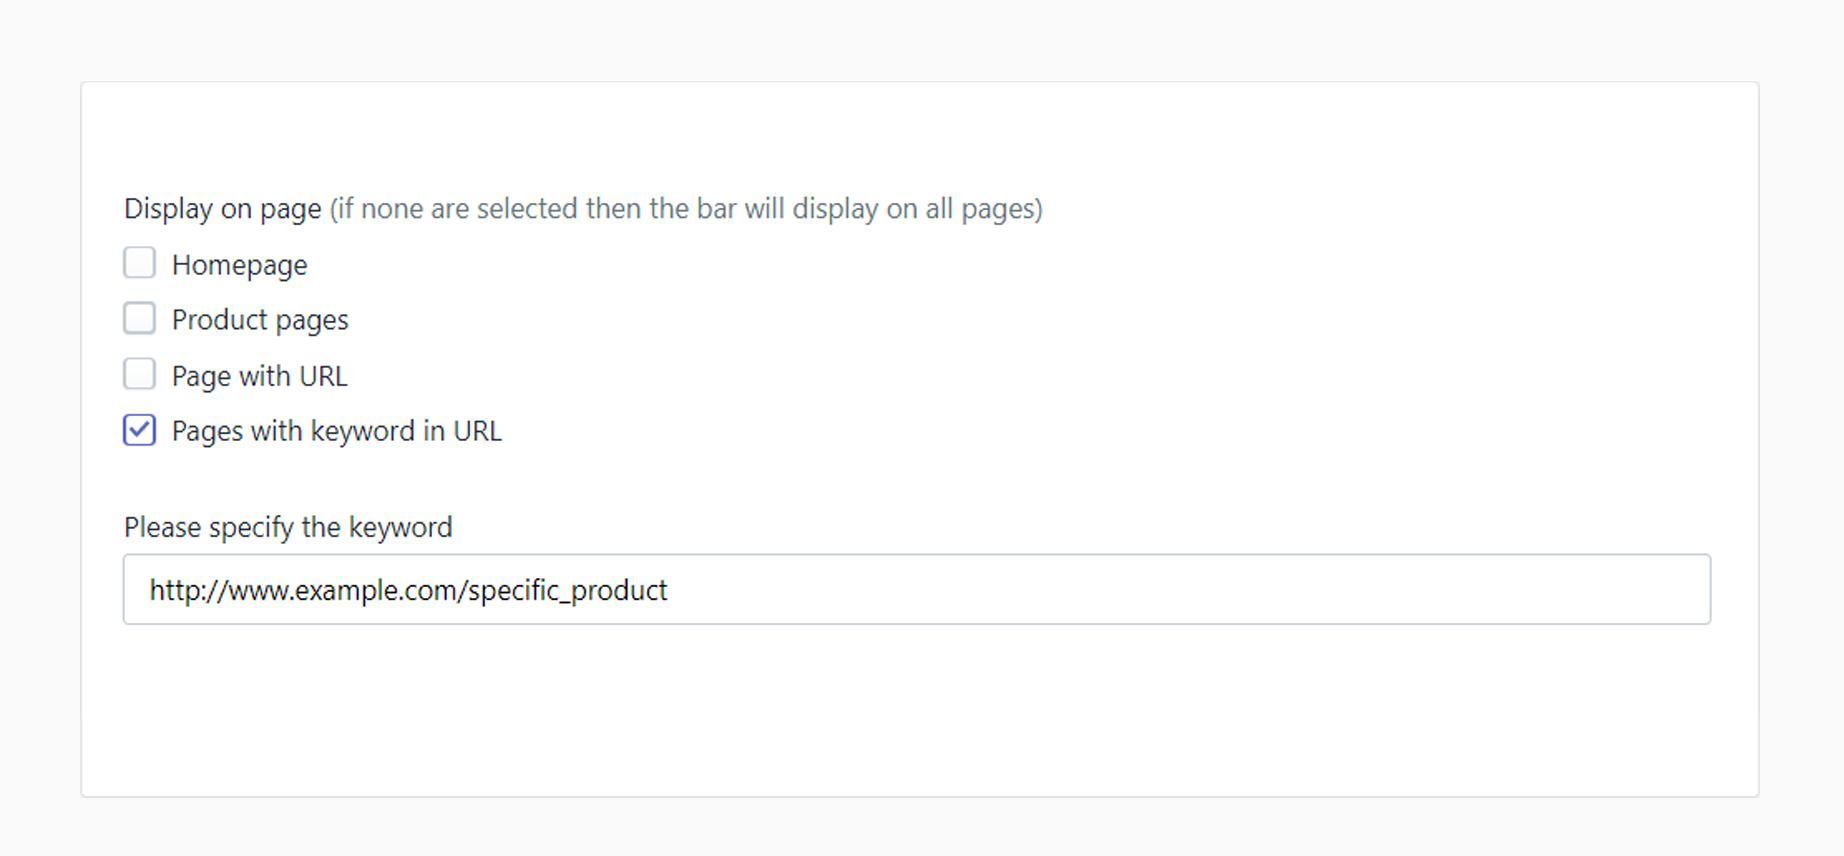
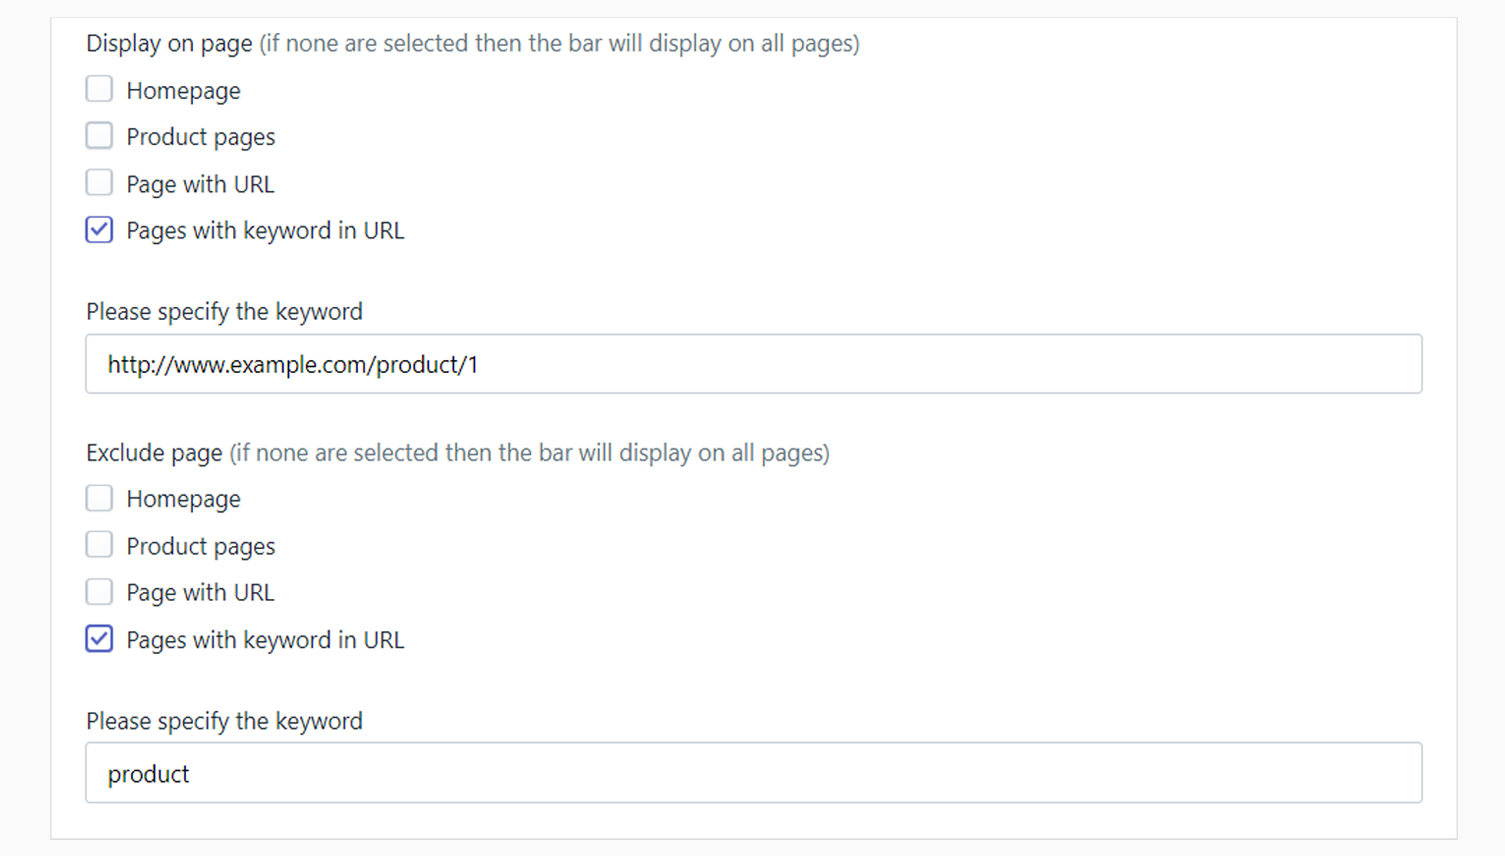
Finally you can specify inclusion or exclusion with a keyword in the URL. Any page with the specified keyword in the URL targeted. For example if you specify keyword – “product”, pages that contain “product“ in their URL would be affected.
Combining the two fields is possible in this use case. For example, you want to display the announcement bar on pages that contain “product” in URL. However, for some reason you want exclude product – “https://www.example.com/product/1”. This is how you would achieve it –
Please, make sure to save and enable the announcement bar, when you’re done.
For this guide, please, click on “Create new bar” (1) or edit an existing bar (2).
When in the edit page, scroll down to the very bottom section called “Targeting configuration”.
The two options related to page targeting are “Display on page” (1) and “Exclude page” (2). We will focus on these fields.
By default, the announcement bar will be visible on every page.
The “Display on page” field is suitable if you would like to show the announcement bar on a few pages. If you select “Homepage”, the bar will only be visible on the homepage.
“Exclude page” field is suitable if you would like to exclude the announcement bar on a few pages. In this scenario, if you select “Homepage”, the bar will be visible on all pages except the homepage.
Targeting homepage is pretty straightforward, however you can also choose to include/exclude specific URLs. It’s best to visit the page you are looking to include/exclude and copy the URL from the address bar.
Finally you can specify inclusion or exclusion with a keyword in the URL. Any page with the specified keyword in the URL targeted. For example if you specify keyword – “product”, pages that contain “product“ in their URL would be affected.
Combining the two fields is possible in this use case. For example, you want to display the announcement bar on pages that contain “product” in URL. However, for some reason you want exclude product – “https://www.example.com/product/1”. This is how you would achieve it –
Please, make sure to save and enable the announcement bar, when you’re done.
